{Thanks to our amazing guest contributor Alison Wiediger of Au Naturel Farm for giving us the rundown on what healthy bread looks like and including a great recipe!}
Many of us are thinking more and more about eating healthy. But sometimes it can be very frustrating figuring out just what “eating healthy” means. More and more, we hear from people that they aren’t eating bread. Bread has somehow gotten placed into the “not healthy” column. Yet, depending upon the type of bread, unless you are gluten intolerant, bread can be a healthy part of a balanced diet. However, finding a healthy loaf of bread, especially in rural Kentucky, can be challenging. So, we make our own and have for many years. I know it can be intimidating at first to bake bread, so I am sharing my foolproof recipe and step by step directions to a healthy, whole grain, not-too-dense loaf of bread even the kids will like.
Okay, I can’t just start with a recipe. First, let’s talk about wheat. Yes, I know there are many grains used in breads, but wheat is the most popular and easiest to begin with. There are 5 basic types of wheat: Hard red, soft red, hard white, soft white and semolina.
Semolina is mostly used for pasta. Hard wheats have more protein and are typically used for risen breads. Soft wheats are used for pastries, biscuits, pie crusts, etc. Wherever high gluten isn’t necessary and/or desired, you use a soft wheat. (All-purpose flour is usually a mix of hard and soft.) Hard wheats are used with risen breads – whether using commercial yeast or a sourdough starter – because they have a higher gluten content. Gluten is an elastic protein that allows the air bubbles from the yeast’s action to be contained and make the dough rise. So, if you have flour with a higher gluten content, you will have a lighter dough (holds more bubbles of air).

Red wheats have a stronger taste than white wheats. Their hulls have more tannin, which has a somewhat bitter taste. Some people prefer the stronger taste, but for folks who are used to commercial white bread, a bread made with white wheat is much more appealing – especially in the transition period.
Now let’s look at whole wheat flour. Whole grains of wheat – commonly called wheat berries – can last a very long time as long as they are protected from insects. But, once that grain is crushed, as it is to be made into flour, it starts to deteriorate. Buy the freshest flour you can find (or grind your own), and keep it in the freezer to keep it fresh.
Lastly, you will find additional gluten in the recipe. It can usually be found in health food stores, online baking supply stores, etc. It makes for a very light loaf of bread. If you cannot find it, or prefer not to use it, just substitute more whole wheat flour. The loaf won’t be quite as light, but will still taste great.
Okay, let’s look at the recipe. By the way, I am putting it in grams with cup equivalents in parentheses. I weigh all my ingredients because it is much more precise, and grams are easier to work with when doubling or halving a recipe. If bread baking becomes a staple in your cooking, a small kitchen scale is a good investment. Until then, cup measures will work.
This recipe is for two loaves and has only 5 ingredients:
760 grams (6 ¼ cups) whole wheat flour (I use white wheat like Wheat Montana’s Prairie Gold)
600 grams (2 ½ cups) water
50 grams gluten (3 T) – optional. If not used, add the amount to your flour total.
20 grams (1 T) salt
20 grams (1 T or 1 pkg) yeast

First, I grind the wheat into flour using a 1970’s era Magic Mill stone mill we purchased several years ago. If you already have flour, you can skip this step.


In a bowl, pour the water, add the salt, flour, gluten if you’re using it, and yeast. This can be stirred until well mixed and then turned out onto a lightly floured board for hand kneading. Rather than hand mixing, I use a Kitchen Aid mixer with dough hook, and mix for about 3 minutes. If you are a cook with not a lot of time, you can also use a bread machine, set for dough only for this step and the first rising. If you are kneading by hand, be careful with the flour on your board and hands. The more flour you knead in, the denser your loaf will be. The dough should be slightly sticky, but workable. Depending on the time of year, you may need to add a LITTLE more flour.
Put the dough into an oiled bowl, turn it over so the top is oiled, cover and let rise. How long it takes depends on the temperature in your kitchen. It needs to double, which may take only 30 minutes in the summer, and could take an hour or considerably more in the winter. Patience is key. This rising time is important to the final taste of your bread. If you are using a bread machine, it will control this part of the process automatically and do a pretty good job.
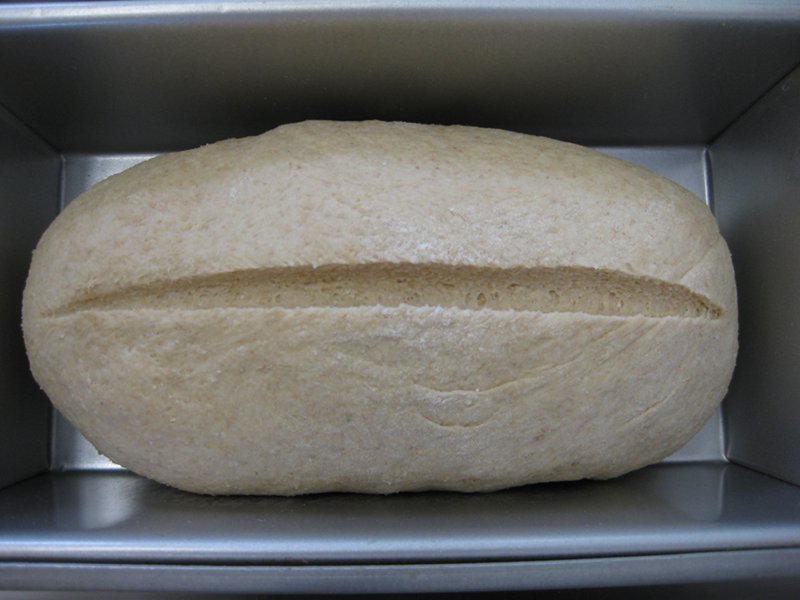
Once it is risen (or the bread maker beeps), you can divide the dough into two equal sections. I use my trusty scale for this, but guessing will likely be close enough for family baking. Form into loaf shapes and place in greased bread pans. 8×4.5” pans work best for this recipe. If your pans are much larger, the loaves will be flatter. Still good to eat, just not as “sandwich loaf” looking. I put a slice into the top of the loaf with a serrated knife for mostly decorative reasons, but you can skip this if you want.

Let rise in the pans until it is 1-1.5 inches above the rim. If it is ready, you can gently poke a finger into the loaf at the edge, and the depression won’t bounce back quickly.

Bake in a 400 degree pre-heated oven until nicely browned. It should take about 25 minutes, but ovens are very different from type to type, so keep an eye on it. When ready, remove from the oven, remove from the pans, and let cool on a rack as long as you can. It is still “baking” at this point, and will actually taste better once it is cool. That said, we often don’t wait that long. If you do cut it warm, it may “crush” a little, but will still taste great and you will have the second loaf to cut later.

One more tip: If you decide to bake bread, please buy a serrated bread knife to cut it. You will be glad you did!
Finally, be ready to be amazed at how good your bread is. Once you start baking good bread, it is hard to stop. It can be addicting. I bake once a week and we freeze whatever we can’t eat in 2-3 days. It makes us feel rich to know we have loaves of bread in the freezer! Use this recipe as a base, and make all the kinds of bread you have always wanted to try – cinnamon, herb, tomato and basil, olive and rosemary, etc. The possibilities are endless! Bake healthy bread for your family and have fun!